Installing All-in-One WP Migration plugin is a simple process. This tutorial will show you how to download, install, and use the plugin to create backups of your website and import them into another WordPress website.
The steps you should take are the following:
-
- In a Google Chrome web browser, open your WordPress website’s admin page. (yourwebsiteurl.com/wp-admin)
- Log in with your username and password.

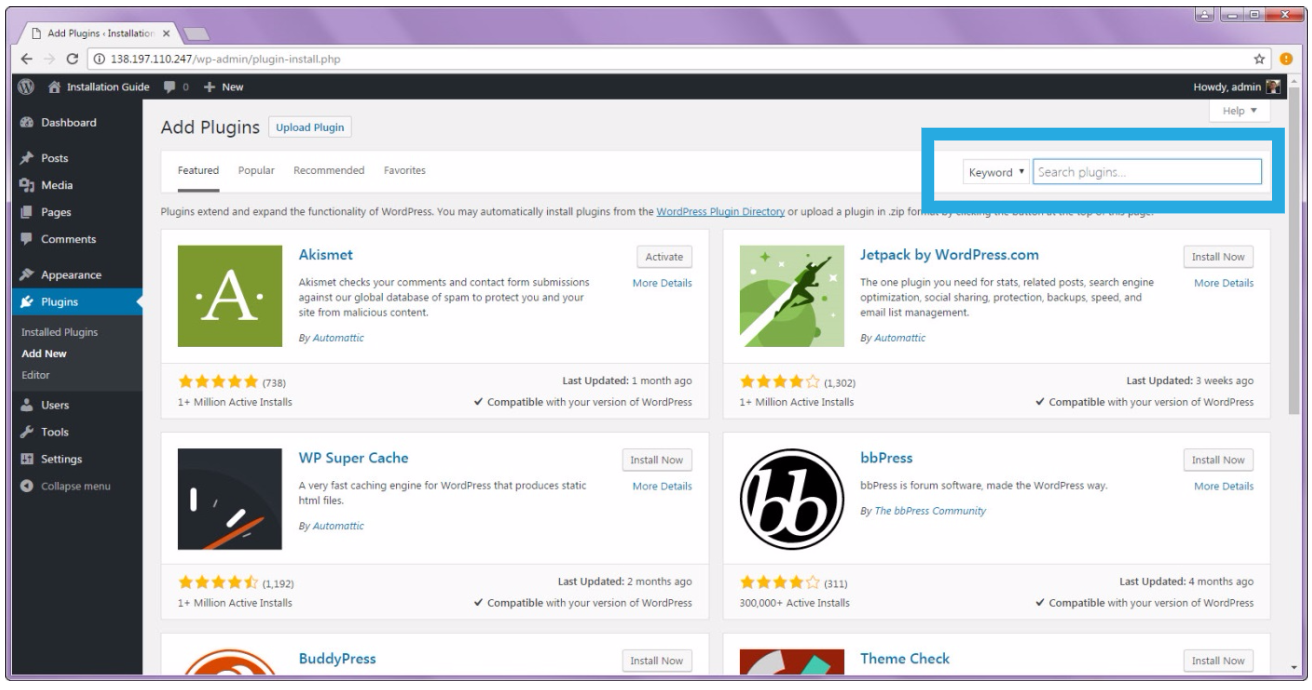
- Navigate to the “Plugins” sub menu.

- On the “Plugins” sub menu, click on “Add New.”

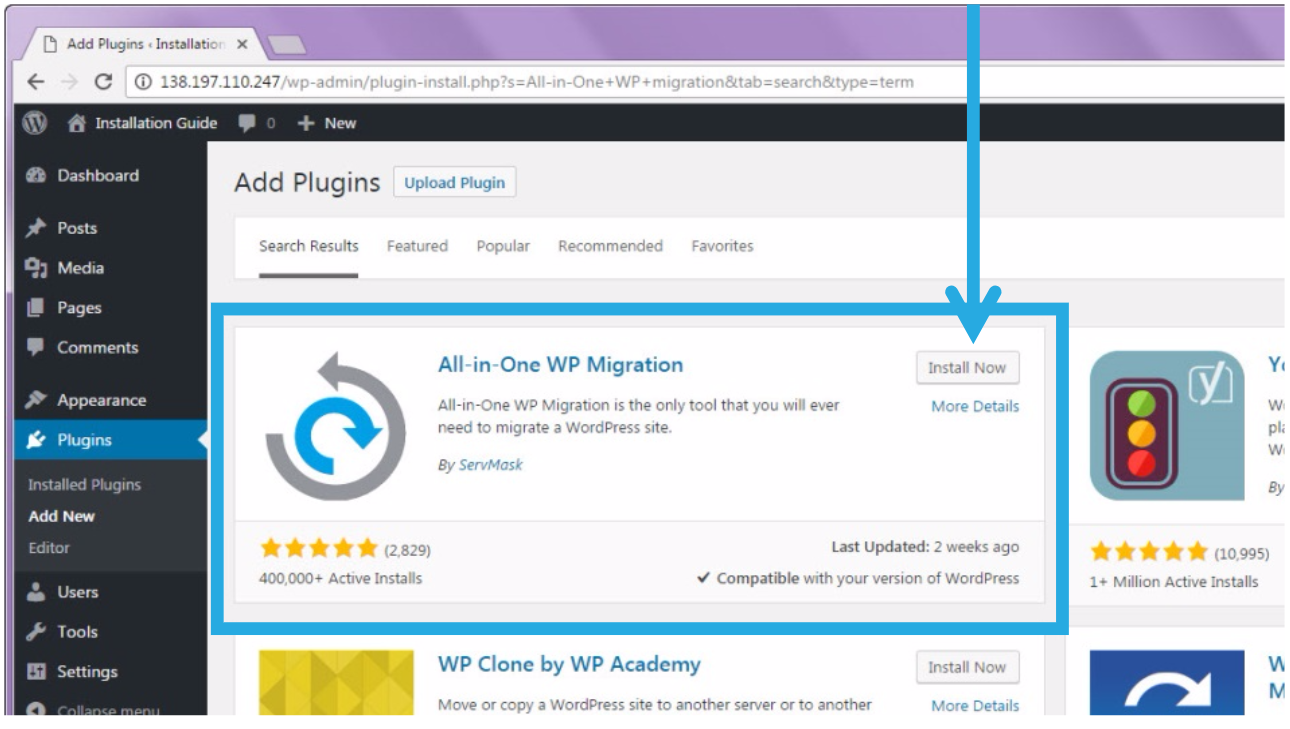
- In the “Search plugins…” box, type in “All-in-One WP Migration” and press Enter on your keyboard.
- Install the All-in-One WP Migration plugin by clicking on the “Install Now” button.
- The installation process is quick. Once it has changed, click on the “Activate” button.
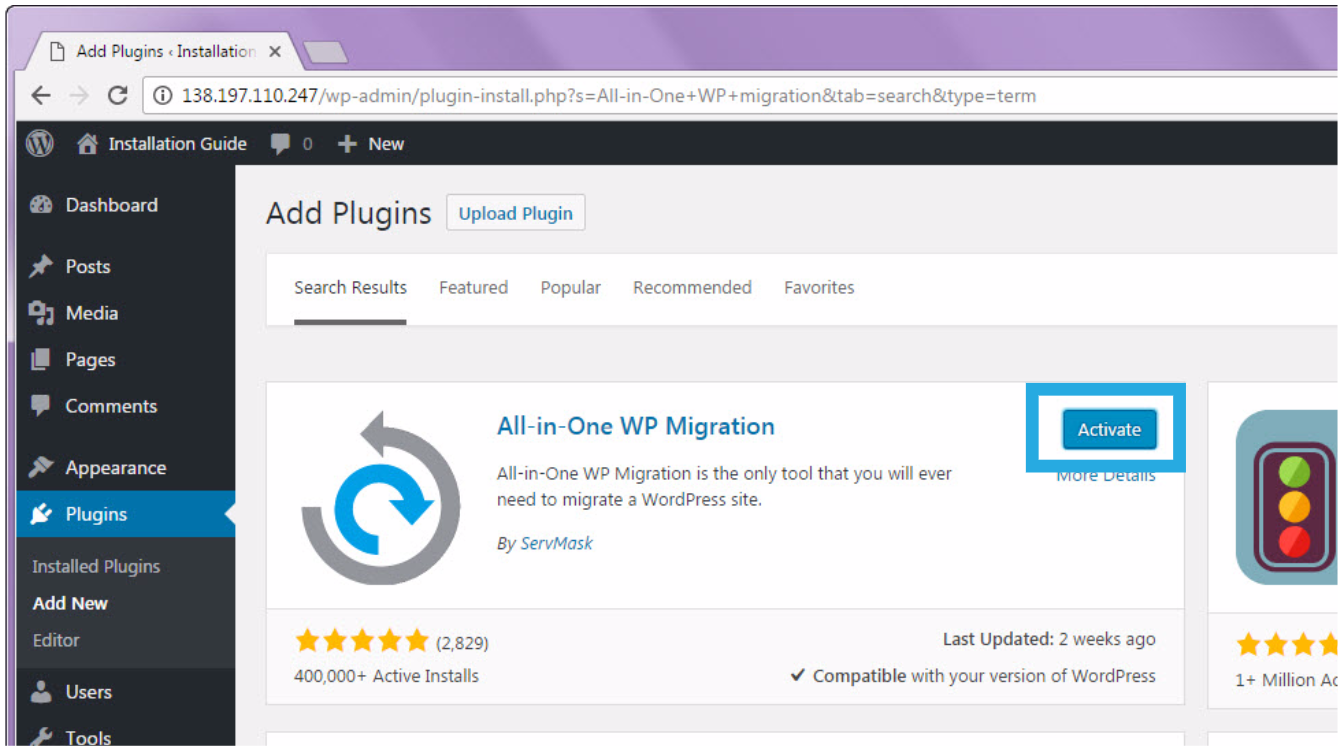
- You will get a notification that states, “Plugin activated.” You will see the new plugin in your list of plugins.

If you see the notice for plugin activation in your Plugins list page, you have successfully installed All-in-One WP Migration tool. You can now use it for exporting and importing backups. For more information about how to use the tool, please refer to https://help.servmask.com/knowledgebase/all-in-one-wp-migration-user-guide/ .