With all our extensions, you have the ability to schedule backups to file or remote storage locations.
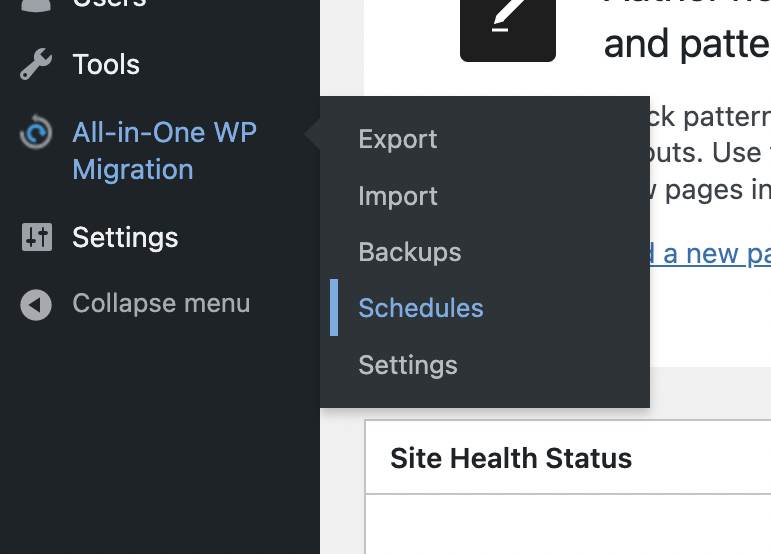
First, select the “Schedules” option from the All-in-One WP Migration plugin menu
This takes you to the dashboard where you see some already-defined settings for daily, weekly, and monthly backups.
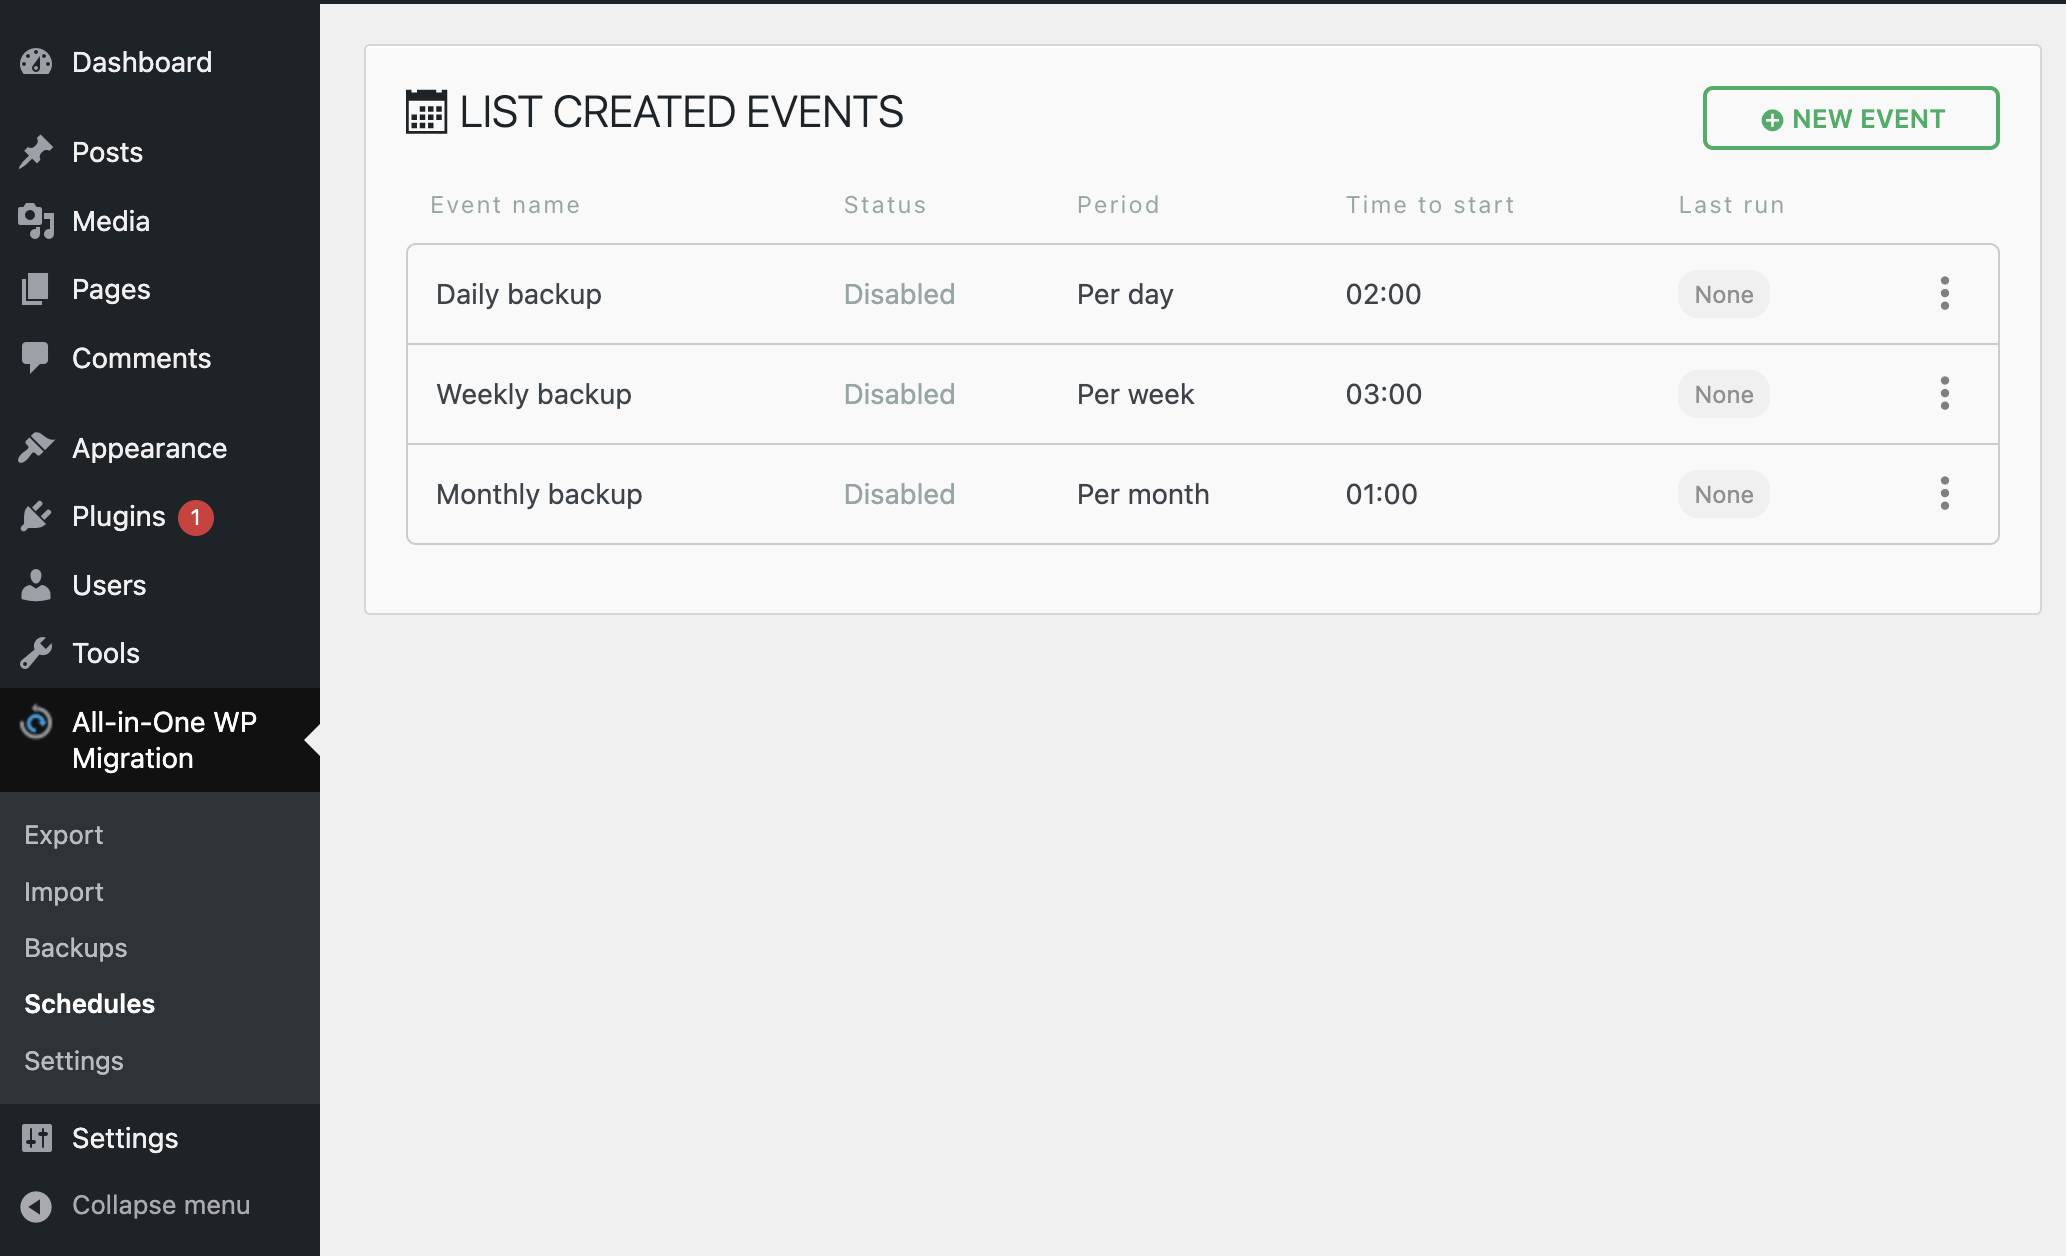
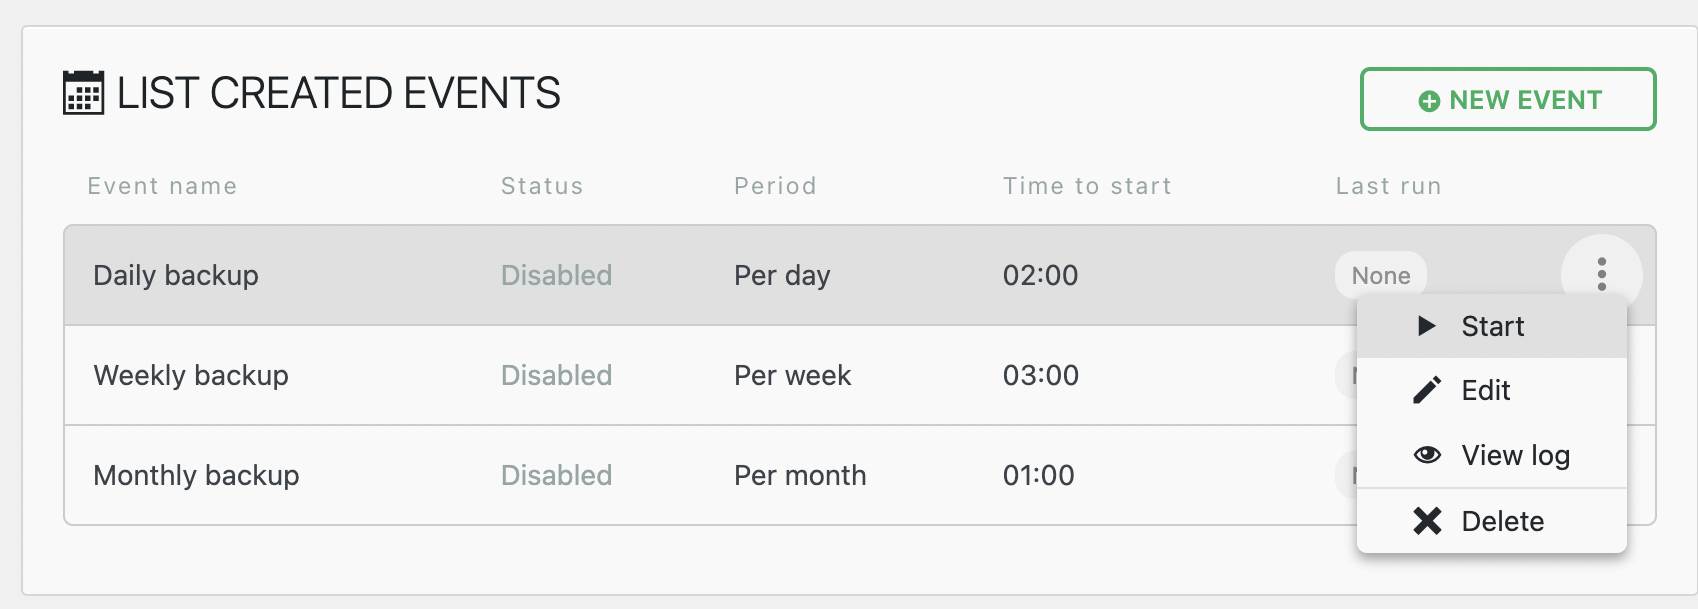
If you are satisfied with the default scheduling settings for any of the options, click on the menu icon on the right and select “Start”. If you need to make edits to the default scheduling settings, you can select the “Edit” option.
From the event page, you see different settings that can help you customize your backup scheduling based on your preferences.
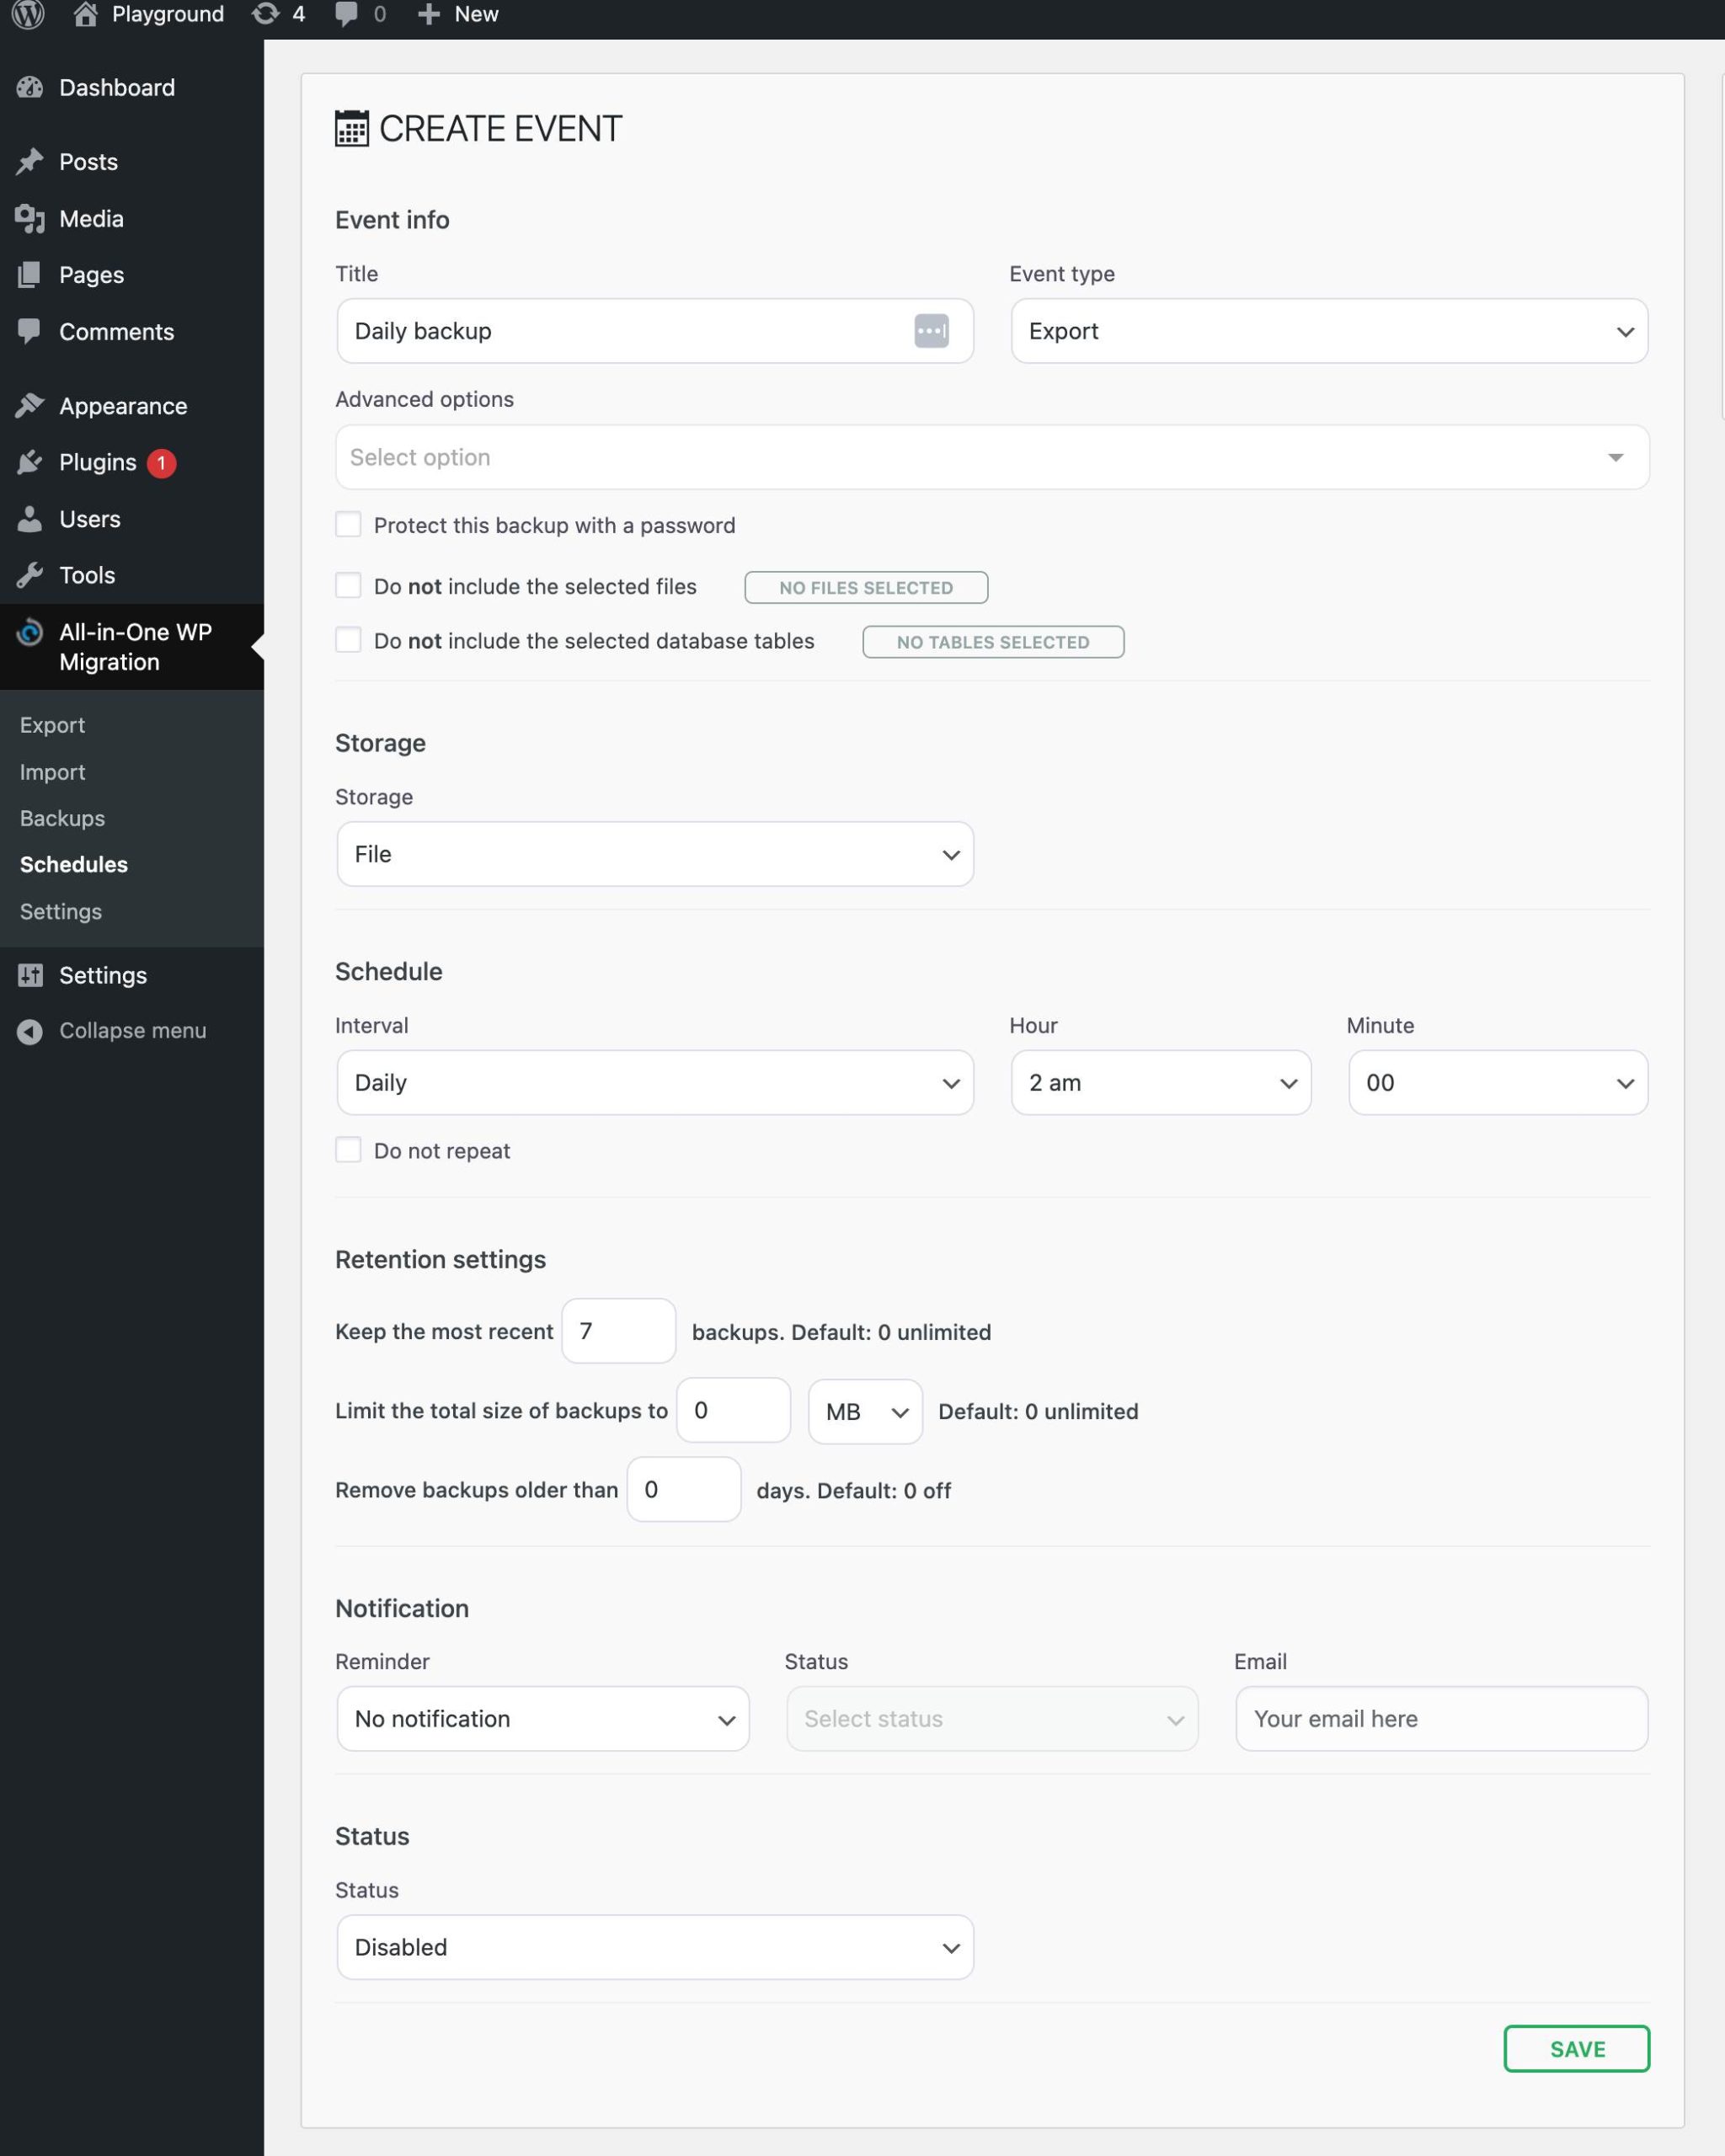
In the Title field, you can choose a descriptive title for your scheduled event.
In the Event Type, choose the Export option.
The Advanced options allow you to determine which parts of the backup to exclude from the export.
For Storage, select File to store the backup on your hosting server. You also have the option to store the backup in remote storage locations when you purchase one of our other extensions. You can find the list of our extensions here
In the Schedule section, you can specify the interval and the specific time you want the export to run.
The Retention settings allow you to configure how many of the backups you would like to keep and when you would like to remove older backups.
For Notification, you can choose to receive notifications by email on Success or Failure of the scheduled backup. Select the type of reminder you would like to receive, set the status to Enable, and input your email address.
In the final Status section, you need to select Enabled for the event to work.
After saving the options, our plugin will do the rest!
If you have any questions or issues, please contact us by sending an email to su*****@******sk.com