 If you are running an internet facing server, you know the services you are running are exposed to the “outside” world and are being constantly probed and attacked by skiddies. Are you tired of all these scans and probes? Yeah me too…
I have had enough of skiddies trying to “hack” a login page or brute-force the SSH service. I needed some tools that could be deployed and configured quickly and easily. I really needed an uncomplicated piece of software that can detect and mitigate brute-force attacks and probes.
When it comes to defending your bacon (and mine), one of the first lines of defense should be fail2ban – https://www.fail2ban.org/wiki/index.php/Main_Page. This nifty little tool is extremely useful for protecting your services that are open to the world. Although Fail2Ban is a small tool, it’s configuration might be a bit confusing at first glance. However, once you get used to it, you’ll notice that it is quite logical and it isn’t really that complicated. The tool can be configured quite quickly – manually or automatically with a configuration management tool – I use Ansible, so this example will show you how you may achieve this using Ansible.
So, how Fail2Ban works?
Fail2Ban scans log files for specified patterns defined as regular expressions in Fail2Ban’s filters. If an offending pattern is found a certain number of times within a given time frame, the corresponding source IP address gets banned (blocked) for a certain amount of time. The time that it is blocked for is configurable and the blocking is done using the default firewall of your Linux OS.
Deploying fail2ban on a single server or a fleet of servers involves installation and configuration, so here’s a quick HOWTO on deploying it via Ansible on CentOS 7, RedHat and Fedora.
Deploying fail2ban via Ansible
For the purposes of this demo, I’ll assume that you are already familiar with Ansible. If not, here’s a link to the quick installation guide from Ansible’s official documentation page: https://docs.ansible.com/ansible/latest/installation_guide/intro_installation.html
To deploy Fail2Ban via Ansible, you’ll need Ansible role and a playbook which will execute that role against a single host, several servers or a fleet of hundreds of servers. The role consists of tasks which are defined in the role’s main.yml file and (configuration) templates.
For this mini-HOWTO, we’ll name the role – fail2ban – obviously 😊
- We create the fail2ban directory which will hold the Ansible role. This role will be run during deployment and will execute the defined tasks (automatic installation and configuration of fail2ban).
- We create a template directory to hold the configuration templates which will be copied to the destination server(s)
- And a directory called handlers. Handlers will be executed when certain tasks report changes and are run at the end of each play. Usually, the handlers are associated with reloads or start/stop/restart of a given service or daemon.
Here’s an example of fail2ban Ansible role directory tree:
fail2ban/
  tasks/
    main.yml
  handlers/
    main.yml
  templates/
    some-template1.j2
    some-template2.j2
Now we have an Ansible role. Let’s fill in the blanks – starting with the role’s tasks. The first task is to install the fail2ban package via yum (the default RHEL/CentOS package manager). This tells Ansible to use the default OS package manager to install the following packages:
– fail2ban
– fail2ban-systemd
Ansible then copies pre-configured Fail2Ban configuration files (we are going to create them in the template directory inside the fail2ban role), filters and actions. There is also a custom shell script which we’ll be using to send notifications to a specific #Slack channel. Once the Fail2Ban application is installed and all configuration files are in place, Ansible will tell the OS to use systemd and to install, enable and start Fail2Ban service. First, we are going to create the main.yml file, filled with various tasks that Ansible will perform. So, here we go!
fail2ban/tasks/main.yml:
---
- name: Install fail2ban on Red Hat system
  yum:
    name: "{{ item }}"
    state: latest
  with_items:
    - fail2ban
    - fail2ban-systemd
  when: ansible_os_family == "RedHat"

- name: Copy slack_notify.sh.j2 to /etc/fail2ban/slack_notify.sh
  template:
    src: slack_notify.sh.j2
    dest: /etc/fail2ban/slack_notify.sh
    mode: 0755
    owner: root
    group: root
  notify:
    - restart fail2ban

- name: Copy fail2ban.local.j2 to /etc/fail2ban/fail2ban.local
  template:
    src: fail2ban.local.j2
    dest: /etc/fail2ban/fail2ban.local
    mode: 0644
    owner: root
    group: root
  notify:
    - restart fail2ban

- name: Copy jail.local.j2 to /etc/fail2ban/jail.local
  template:
    src: jail.local.j2
    dest: /etc/fail2ban/jail.local
    mode: 0644
    owner: root
    group: root
  notify:
    - restart fail2ban

- name: Copy iptables-multiport.conf.j2 to /etc/fail2ban/action.d/iptables-multiport.conf
  template:
    src: iptables-multiport.conf.j2
    dest: /etc/fail2ban/action.d/iptables-multiport.conf
    mode: 0644
    owner: root
    group: root
  notify:
    - restart fail2ban

- name: Copy nginx-generic.conf.j2 to /etc/fail2ban/filter.d/nginx-generic.conf
  template:
    src: nginx-generic.conf.j2
    dest: /etc/fail2ban/filter.d/nginx-generic.conf
    mode: 0644
    owner: root
    group: root
  notify:
    - restart fail2ban

- name: Copy nginx-wordpress.conf.j2 to /etc/fail2ban/filter.d/nginx-wordpress.conf
  template:
    src: nginx-wordpress.conf.j2
    dest: /etc/fail2ban/filter.d/nginx-wordpress.conf
    mode: 0644
    owner: root
    group: root
  notify:
    - restart fail2ban

- name: Copy slack.conf.j2 to /etc/fail2ban/action.d/slack.conf
  template:
    src: slack.conf.j2
    dest: /etc/fail2ban/action.d/slack.conf
    mode: 0644
    owner: root
    group: root
  notify:
    - restart fail2ban

- name: Enable fail2ban service
  systemd:
    name: fail2ban
    enabled: yes
    state: started
This is the main fail2ban configuration file. We are not going to change anything and will be using the default configuration options:
fail2ban/templates/fail2ban.local:
```
# Fail2Ban main configuration file
#
# Comments: use '#' for comment lines and ';' (following a space) for inline comments
#
# Changes:  in most of the cases you should not modify this
#           file, but provide customizations in fail2ban.local file, e.g.:
#
# [Definition]
# loglevel = DEBUG
#

[Definition]

# Option: loglevel
# Notes.: Set the log level output.
#         CRITICAL
#         ERROR
#         WARNING
#         NOTICE
#         INFO
#         DEBUG
# Values: [ LEVEL ]  Default: ERROR
#
loglevel = INFO

# Option: logtarget
# Notes.: Set the log target. This could be a file, SYSLOG, STDERR or STDOUT.
#         Only one log target can be specified.
#         If you change logtarget from the default value and you are
#         using logrotate -- also adjust or disable rotation in the
#         corresponding configuration file
#         (e.g. /etc/logrotate.d/fail2ban on Debian systems)
# Values: [ STDOUT | STDERR | SYSLOG | FILE ]  Default: STDERR
#
logtarget = /var/log/fail2ban.log

# Option: syslogsocket
# Notes: Set the syslog socket file. Only used when logtarget is SYSLOG
#        auto uses platform.system() to determine predefined paths
# Values: [ auto | FILE ]  Default: auto
syslogsocket = auto

# Option: socket
# Notes.: Set the socket file. This is used to communicate with the daemon. Do
#         not remove this file when Fail2ban runs. It will not be possible to
#         communicate with the server afterwards.
# Values: [ FILE ]  Default: /var/run/fail2ban/fail2ban.sock
#
socket = /var/run/fail2ban/fail2ban.sock

# Option: pidfile
# Notes.: Set the PID file. This is used to store the process ID of the
#         fail2ban server.
# Values: [ FILE ]  Default: /var/run/fail2ban/fail2ban.pid
#
pidfile = /var/run/fail2ban/fail2ban.pid

# Options: dbfile
# Notes.: Set the file for the fail2ban persistent data to be stored.
#         A value of ":memory:" means database is only stored in memory
#         and data is lost when fail2ban is stopped.
#         A value of "None" disables the database.
# Values: [ None :memory: FILE ] Default: /var/lib/fail2ban/fail2ban.sqlite3
dbfile = /var/lib/fail2ban/fail2ban.sqlite3

# Options: dbpurgeage
# Notes.: Sets age at which bans should be purged from the database
# Values: [ SECONDS ] Default: 86400 (24hours)
dbpurgeage = 86400
The default jail.local.j2 file which will be used by fail2ban is shown below. You don’t have to change the default jail.conf file. Once fail2ban is installed on your system, you just copy the jail.conf file over jail.local file (jail.conf -> jail.local). This ensures that updating or upgrading fail2ban package isn’t going to change the configuration file and its settings. The important parts in the jail.local.j2 file are:
– ignoreip – This is an important step which sets the IP addresses to be ignored by the Fail2Ban service. Usually, you define localhost (127.0.0.1), the IP address(es) of the server itself (in our case we are going to use Ansible facts – IP addresses associated with eth0 and eth1 NICs). This must be done in order to prevent the server from being banned by itself. We certainly don’t want this to happen.
– bantime – here we are using a variable {{ bantime }} and we are going to set the actual ban time (in seconds) via the playbook (which we are going to create a bit later in this tutorial)
– destemail – This option sets the destination email address (to be notified in case of ban, unban, etc) again via Ansible playbook.
– action_with_slack_notification – sets a slack notification for ban/unban actions
– the JAIL which should be monitored needs to be defined. In the below example, we are going to monitor the ssh logs for failed login attempts and monitor our web server (Nginx in our case) for specific patterns (which we are going to configure later in this tutorial).
#
# WARNING: heavily refactored in 0.9.0 release.  Please review and
#          customize settings for your setup.
#
# Changes:  in most of the cases you should not modify this
#           file, but provide customizations in jail.local file,
#           or separate .conf files under jail.d/ directory, e.g.:
#
# HOW TO ACTIVATE JAILS:
#
# YOU SHOULD NOT MODIFY THIS FILE.
#
# It will probably be overwritten or improved in a distribution update.
#
# Provide customizations in a jail.local file or a jail.d/customisation.local.
# For example to change the default bantime for all jails and to enable the
# ssh-iptables jail the following (uncommented) would appear in the .local file.
# See man 5 jail.conf for details.
#
# [DEFAULT]
# bantime = 3600
#
# [sshd]
# enabled = true
#
# See jail.conf(5) man page for more information


# Comments: use '#' for comment lines and ';' (following a space) for inline comments


[INCLUDES]

#before = paths-distro.conf
before = paths-fedora.conf

# The DEFAULT allows a global definition of the options. They can be overridden
# in each jail afterwards.

[DEFAULT]

#
# MISCELLANEOUS OPTIONS
#

# "ignoreip" can be an IP address, a CIDR mask or a DNS host. Fail2ban will not
# ban a host which matches an address in this list. Several addresses can be
# defined using space (and/or comma) separator.
ignoreip = 127.0.0.1/8 10.0.0.1/8 {{ ansible_eth0.ipv4.address }} {{ ansible_eth1.ipv4.address }}

# External command that will take an tagged arguments to ignore, e.g. ,
# and return true if the IP is to be ignored. False otherwise.
#
# ignorecommand = /path/to/command
ignorecommand =

# "bantime" is the number of seconds that a host is banned.
bantime  = {{ bantime }}

# A host is banned if it has generated "maxretry" during the last "findtime"
# seconds.
findtime  = 600

# "maxretry" is the number of failures before a host get banned.
maxretry = 5

# "backend" specifies the backend used to get files modification.
# Available options are "pyinotify", "gamin", "polling", "systemd" and "auto".
# This option can be overridden in each jail as well.
#
# pyinotify: requires pyinotify (a file alteration monitor) to be installed.
#              If pyinotify is not installed, Fail2ban will use auto.
# gamin:     requires Gamin (a file alteration monitor) to be installed.
#              If Gamin is not installed, Fail2ban will use auto.
# polling:   uses a polling algorithm which does not require external libraries.
# systemd:   uses systemd python library to access the systemd journal.
#              Specifying "logpath" is not valid for this backend.
#              See "journalmatch" in the jails associated filter config
# auto:      will try to use the following backends, in order:
#              pyinotify, gamin, polling.
#
# Note: if systemd backend is chosen as the default but you enable a jail
#       for which logs are present only in its own log files, specify some other
#       backend for that jail (e.g. polling) and provide empty value for
#       journalmatch. See https://github.com/fail2ban/fail2ban/issues/959#issuecomment-74901200
backend = auto

# "usedns" specifies if jails should trust hostnames in logs,
#   warn when DNS lookups are performed, or ignore all hostnames in logs
#
# yes:   if a hostname is encountered, a DNS lookup will be performed.
# warn:  if a hostname is encountered, a DNS lookup will be performed,
#        but it will be logged as a warning.
# no:    if a hostname is encountered, will not be used for banning,
#        but it will be logged as info.
# raw:   use raw value (no hostname), allow use it for no-host filters/actions (example user)
usedns = warn

# "logencoding" specifies the encoding of the log files handled by the jail
#   This is used to decode the lines from the log file.
#   Typical examples:  "ascii", "utf-8"
#
#   auto:   will use the system locale setting
logencoding = auto

# "enabled" enables the jails.
#  By default all jails are disabled, and it should stay this way.
#  Enable only relevant to your setup jails in your .local or jail.d/*.conf
#
# true:  jail will be enabled and log files will get monitored for changes
# false: jail is not enabled
enabled = false


# "filter" defines the filter to use by the jail.
#  By default jails have names matching their filter name
#
filter = %(__name__)s


#
# ACTIONS
#

# Some options used for actions

# Destination email address used solely for the interpolations in
# jail.{conf,local,d/*} configuration files.
destemail = {{ destemail }}

# Sender email address used solely for some actions
sender = Fail2Ban

# E-mail action. Since 0.8.1 Fail2Ban uses sendmail MTA for the
# mailing. Change mta configuration parameter to mail if you want to
# revert to conventional 'mail'.
mta = sendmail

# Default protocol
protocol = tcp

# Specify chain where jumps would need to be added in iptables-* actions
chain = INPUT

# Ports to be banned
# Usually should be overridden in a particular jail
port = 0:65535

# Format of user-agent https://tools.ietf.org/html/rfc7231#section-5.5.3
fail2ban_agent = Fail2Ban/%(fail2ban_version)s

#
# Action shortcuts. To be used to define action parameter

# Default banning action (e.g. iptables, iptables-new,
# iptables-multiport, shorewall, etc) It is used to define
# action_* variables. Can be overridden globally or per
# section within jail.local file
banaction = iptables-multiport
banaction_allports = iptables-allports

# Slack action
action_with_slack_notification = %(banaction)s[name=%(__name__)s, bantime="%(bantime)s", port="%(port)s", protocol="%(protocol)s", chain="%(chain)s"]
                                 slack[name=%(__name__)s]

# The simplest action to take: ban only
action_ = %(banaction)s[name=%(__name__)s, bantime="%(bantime)s", port="%(port)s", protocol="%(protocol)s", chain="%(chain)s"]

# ban & send an e-mail with whois report to the destemail.
action_mw = %(banaction)s[name=%(__name__)s, bantime="%(bantime)s", port="%(port)s", protocol="%(protocol)s", chain="%(chain)s"]
            %(mta)s-whois[name=%(__name__)s, sender="%(sender)s", dest="%(destemail)s", protocol="%(protocol)s", chain="%(chain)s"]

# ban & send an e-mail with whois report and relevant log lines
# to the destemail.
action_mwl = %(banaction)s[name=%(__name__)s, bantime="%(bantime)s", port="%(port)s", protocol="%(protocol)s", chain="%(chain)s"]
             %(mta)s-whois-lines[name=%(__name__)s, sender="%(sender)s", dest="%(destemail)s", logpath=%(logpath)s, chain="%(chain)s"]

# See the IMPORTANT note in action.d/xarf-login-attack for when to use this action
#
# ban & send a xarf e-mail to abuse contact of IP address and include relevant log lines
# to the destemail.
action_xarf = %(banaction)s[name=%(__name__)s, bantime="%(bantime)s", port="%(port)s", protocol="%(protocol)s", chain="%(chain)s"]
             xarf-login-attack[service=%(__name__)s, sender="%(sender)s", logpath=%(logpath)s, port="%(port)s"]

# ban IP on CloudFlare & send an e-mail with whois report and relevant log lines
# to the destemail.
action_cf_mwl = cloudflare[cfuser="%(cfemail)s", cftoken="%(cfapikey)s"]
                %(mta)s-whois-lines[name=%(__name__)s, sender="%(sender)s", dest="%(destemail)s", logpath=%(logpath)s, chain="%(chain)s"]

# Report block via blocklist.de fail2ban reporting service API
#
# See the IMPORTANT note in action.d/blocklist_de.conf for when to
# use this action. Create a file jail.d/blocklist_de.local containing
# [Init]
# blocklist_de_apikey = {api key from registration]
#
action_blocklist_de  = blocklist_de[email="%(sender)s", service=%(filter)s, apikey="%(blocklist_de_apikey)s", agent="%(fail2ban_agent)s"]

# Report ban via badips.com, and use as blacklist
#
# See BadIPsAction docstring in config/action.d/badips.py for
# documentation for this action.
#
# NOTE: This action relies on banaction being present on start and therefore
# should be last action defined for a jail.
#
action_badips = badips.py[category="%(__name__)s", banaction="%(banaction)s", agent="%(fail2ban_agent)s"]
#
# Report ban via badips.com (uses action.d/badips.conf for reporting only)
#
action_badips_report = badips[category="%(__name__)s", agent="%(fail2ban_agent)s"]

# Choose default action.  To change, just override value of 'action' with the
# interpolation to the chosen action shortcut (e.g.  action_mw, action_mwl, etc) in jail.local
# globally (section [DEFAULT]) or per specific section
action = %(action_mwl)s
         %(action_with_slack_notification)s

#
# JAILS
#

#
# SSH servers
#

[sshd]
enabled = true
# To use more aggressive sshd filter (inclusive sshd-ddos failregex):
#filter = sshd-aggressive
port    = ssh
logpath = %(sshd_log)s
backend = %(sshd_backend)s


[sshd-ddos]
# This jail corresponds to the standard configuration in Fail2ban.
# The mail-whois action send a notification e-mail with a whois request
# in the body.
port    = ssh
logpath = %(sshd_log)s
backend = %(sshd_backend)s


#
# HTTP servers
#

[nginx-generic]
enabled = true
port    = http,https
logpath  = %(nginx_access_log)s
maxretry = 5

[nginx-wordpress]
enabled  = true
port     = http,https
logpath  = %(nginx_access_log)s
maxretry = 5


# Ban attackers that try to use PHP's URL-fopen() functionality
# through GET/POST variables. - Experimental, with more than a year
# of usage in production environments.

[php-url-fopen]

port    = http,https
enabled = true
logpath = %(nginx_access_log)s
          %(apache_access_log)s

# Jail for more extended banning of persistent abusers
# !!! WARNINGS !!!
# 1. Make sure that your loglevel specified in fail2ban.conf/.local
#    is not at DEBUG level -- which might then cause fail2ban to fall into
#    an infinite loop constantly feeding itself with non-informative lines
# 2. Increase dbpurgeage defined in fail2ban.conf to e.g. 648000 (7.5 days)
#    to maintain entries for failed logins for sufficient amount of time
[recidive]

logpath  = /var/log/fail2ban.log
banaction = %(banaction_allports)s
bantime  = 604800  ; 1 week
findtime = 86400   ; 1 day
The following configuration template sets the notifications and how they will be sent to Slack. In our specific case, we are going to use a simple shell script which will be triggered upon ban/unban and will execute a POST request against Slack’s API.
Note. You must configure you own incoming slack web hook so that you can execute remote API calls. This can be achieved by visiting the following url: https://slack.com/apps/A0F7XDUAZ-incoming-webhooks
roles/fail2ban/templates/slack.conf.j2:
[Definition]

actioncheck =
actionstart =
actionstop =
actionban = /bin/bash /etc/fail2ban/slack_notify.sh "Banned _country_  in the jail  after  attempts" "" > /dev/null 2>&1
actionunban = /bin/bash /etc/fail2ban/slack_notify.sh "Unbanned _country_  in the jail " "" > /dev/null 2>&1

# Default name of the chain
#
name = default
And here is a simple shell script for sending notifications to Slack.
roles/fail2ban/templates/slack_notify.sh.j2:
#!/bin/bash

# message first command argument
MESSAGE=$1
HOOK_URL={{ hook_url }}
HOST=$(hostname)

CHANNEL="#fail2ban"
USERNAME="fail2ban"
ICON=":cop:"

# ip second command argument
IP=$2
# lets find out from what country we have our hacker
COUNTRY=$(curl ipinfo.io/${IP}/country)
# converting country to lower case.
COUNTRY=$(echo "$COUNTRY" | tr -s  '[:upper:]'  '[:lower:]')
# slack emoji
COUNTRY=":flag-$COUNTRY:"

# replace _country_ template to the country emoji
MESSAGE="${MESSAGE/_country_/$COUNTRY}"

curl -X POST --data-urlencode "payload={\"channel\": \"${CHANNEL}\", \"username\": \"${USERNAME}\", \"text\": \"[${HOST}] ${MESSAGE}\", \"icon_emoji\": \"${ICON}\"}" ${HOOK_URL}

exit 0
This is the iptables action script. The script will generate and set the iptables firewall rule and will ban/unban the “bad” IP address.
roles/fail2ban/templates/iptables-multiport.conf.j2:
# Fail2Ban configuration file
#
# Author: Cyril Jaquier
# Modified by Yaroslav Halchenko for multiport banning
#

[INCLUDES]

before = iptables-common.conf

[Definition]

# Option:  actionstart
# Notes.:  command executed once at the start of Fail2Ban.
# Values:  CMD
#
actionstart =  -N f2b-
               -A f2b- -j
               -I  -p  -m multiport --dports  -j f2b-

# Option:  actionstop
# Notes.:  command executed once at the end of Fail2Ban
# Values:  CMD
#
actionstop =  -D  -p  -m multiport --dports  -j f2b-
              -F f2b-
              -X f2b-

# Option:  actioncheck
# Notes.:  command executed once before each actionban command
# Values:  CMD
#
actioncheck =  -n -L  | grep -q 'f2b-[ \t]'

# Option:  actionban
# Notes.:  command executed when banning an IP. Take care that the
#          command is executed with Fail2Ban user rights.
# Tags:    See jail.conf(5) man page
# Values:  CMD
#
actionban =  -I f2b- 1 -s  -j

# Option:  actionunban
# Notes.:  command executed when unbanning an IP. Take care that the
#          command is executed with Fail2Ban user rights.
# Tags:    See jail.conf(5) man page
# Values:  CMD
#
actionunban =  -D f2b- -s  -j

[Init]
We can now create a simple filter to monitor Nginx’s access log for specific patterns. If these patterns are matched N number of times (default – maxretry = 5) then the source IP address of the request will be banned – firewalled. A notification email will be sent to the {{ destemail }}. Also a notification message will be sent to the defined Slack channel. This way you will be notified for the auto-actions performed by Fail2Ban.
The same process is followed for the unban procedure. The firewall rule will be remove after the specified bantime’s up and notifications will be send via email and Slack.
An addition to the following pattern is the availability of the so called “goodbots” In our example, we use UptimeRobot to monitor the server by “pinging” the website. UptimeRobot generates GET requests for web pages at equal intervals and this may trigger a false positive action by fail2ban. We use the ignoreregex settings to define patterns which should be ignored by fail2ban. We basically tell fail2ban to ignore the User-Agent – “UptimeRobot/2\.0” so no actions will be taken if the pattern is matched.
roles/fail2ban/templates/nginx-generic.conf.j2:
# 1) Catch requests for certain scripts we don't host
# 2) Catch script requests we don't host

[Definition]

goodbots  = UptimeRobot/2\.0


failregex = ^ .* "(GET|POST|HEAD|PROPFIND) /+(?i)(a2billing|apache|axis|cfide|cgi|cms|config|etc|\.git|hnap|inc|jenkins|jmx-|joomla|lib|linuxsucks|msd|muieblackcat|mysql|myadmin|n0w|owa-autodiscover|pbxip|php|pma|recordings|sap|sdk|script|shell|sqlite|vmskdl44rededd|vtigercrm|w00tw00t|webdav|websql|xampp|xxbb|phpmyadmin|phpMyAdmin)
            ^ .* "(GET|POST|HEAD) /[^"]+\.(asp|cgi|exe|jsp|mvc|pl)( |\?)

ignoreregex = ^ -.*"(GET|POST|HEAD).*HTTP.*"(?:%(goodbots)s)"$
Basic WordPress defence.
We can also define a filter to monitor Nginx’s access log for patterns related to WordPress. Basically, Fail2Ban will search for multiple successful (200) GET|POST|HEAD requests to /wp-login.php. It will also look for GET|POST|HEAD request with http return code 444 and for POST request to /wp-comments-post.php with http return code 403. If one of the mentioned patterns gets matched for maxretry number of times, the source IP address will be banned.
roles/fail2ban/templates/nginx-wordpress.conf.j2:
# Fail2Ban filter for WordPress
#
#

[Definition]

failregex = ^ -.*(GET|POST|HEAD).* /wp-login.php HTTP/1\.." 200
            ^ - .* "(GET|POST|HEAD).*HTTP.*" 444 0 ".+" ".+"$
            ^ - .* "POST /wp-comments-post.php HTTP.*" 403 [0-9]{1,} ".+" ".+"$
By default, Fail2Ban has already pre-configured SSH filter which monitors the default SSH log file. You don’t have to configure it, it should work out-of-the-box for most Linux distributions. In our example, we are using CentOS 7 and the log file which gets monitored is /var/log/secure. If someone scans or tries to brute-force the SSH service and therefore generates more than 5 failed login attempts, their IP will be banned automatically by fail2ban.
Note that actually by default the settings is in jail.local but if you are copying jail.conf over jail.local for the first time, look at the [sshd] section and you’ll notice that this filter is not enabled. You just have to enable it by adding:
enabled = yes
under the [sshd] section.
In our example – sshd filter is enabled by default.
Once we create the role, it’s tasks and configuration templates, we are ready to move forward and create a simple playbook that can be executed against a server, several servers or maybe a fleet of servers. In our jail.conf.j2 template file we have define a few dynamic configuration items:
– bantime
– destemail
Also in the slack_notify.sh.j2 shell script there’s a dynamic variable for slack incoming webhook url
– hook_url
We should pass these variables to the Ansible role, therefore we define these vars inside the playbook as shown below. These settings will be automatically translated into the generated configuration files (from the .j2 template files).
Here’s an example playbook
install-fail2ban.yml:
---

- hosts: some-remote-server
  become: yes
  become_method: sudo

  vars:
    # Fail2Ban vars
    # bantime is defined in minutes
    bantime: 3600
    destemail: "em***@****fy.me"
    hook_url: "https://hooks.slack.com/services/id/id/id"

   - fail2ban
In order to execute a playbook, you must define your server or fleet of servers in your Ansible inventory file. By default, Ansible searches for inventory file inside an inventory/ directory. The inventory file is named, you guess it – inventory, so here’s a simple example.
inventory/inventory:
[some-remote-server]
some-remote-server hostname=some-remote-server ansible_user=you_remote_ssh_user ansible_host=10.10.10.10 ansible_port=22
If your ssh client is configured to connect to “some-remote-server”, preferably using private ssh keys, then you are good to go. You can run the playbook in so-called check or dry-run mode, which is going to play exactly what will be run on the remote server without actually changing anything on that server. Once you are 100% sure that these are the correct tasks to be run remotely you can simply execute the playbook.
Example RUN in check mode:
ansible-playbook -C install-fail2ban.yml
Example RUN in normal mode:
ansible-playbook install-fail2ban.yml
The last command will install and automatically configure fail2ban on your desired (destination) server. Your fail2ban will start to monitor your web server (Nginx) and all incoming SSH connections to the server.
Note – if you don’t have Nginx installed on the destination server and you are trying to set up fail2ban to monitor nginx – it’ll simply fail to start. If fail2ban is not able to find the default nginx access or error log file, the service will fail to start. So… to cut a long story short, if you are not going to monitor Nginx just remove nginx filter configuration from jail.local.
First thing you’ll notice once the service has been started is the tons of emails you are getting 😊. Don’t worry this is something to be expected. The same goes for the Slack notifications.
Here are example screenshots, how this should look…
1. E-mail notification
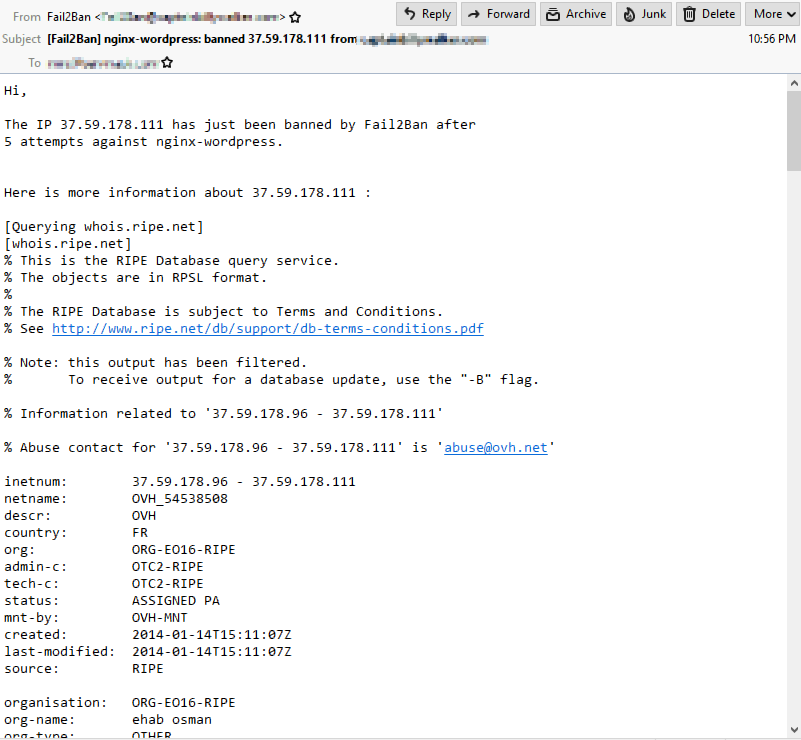
2. Slack notification

You now have a working configuration of Fail2Ban service saving your bacon 😊 At least in terms of protection against SSH brute-force attacks and scans.
If you are hosting WordPress, /wp-login.php is also protected from brute-force attacks. Fail2Ban will be triggered in the case of 5 login attempts. Just be aware – if you forget your WordPress password and you try to log in 5 times unsuccessfully, you will be banned for the default ban time 😊. However as mentioned earlier in the article, you can always add your IP address to the ignore list.
P.S. The notification “SPAM” is really annoying, but it is what it is. At least you know who gets banned and you can always dig in the fail2ban configuration and make the necessary changes to decrease the number of notifications you are receiving. Fail2Ban keeps all annoying evil users away…
Enjoy 😊